Netbeans etiketine sahip kayıtlar gösteriliyor. Tüm kayıtları göster

28 Mayıs 2012 Pazartesi

Setting up a PHP Project in the NetBeans IDE

1. Start the IDE, switch to the Projects window, and choose File > New Project. The Choose Project panel opens.

2. In the Categories list, choose PHP.

3. In the Projects area, choose PHP Application and click Next. The New PHP Project > Name and Location panel opens.


4. In the Project Name text field, enter NewPHPProject.

5. In the Sources Folder field, browse for your PHP document root and create a subfolder there called NewPHPProject. The document root is the folder where the web server looks for files to open in the browser. The document root is specified in the web server configuration file. For example, on Xampp, the document root is XAMPP_HOME/htdocs.

6. Leave all other fields with their default values. Click Next. The Run Configuration window opens.


7. In the Run As drop-down list, select Local Web Site. The project will run on your local Apache server. Your other options are to run the project remotely via FTP and to run it from the command line.


8. Leave the Project URL at default.

9. Click Finish. The IDE creates the project.

10. The NewPHPProject tree appears in the Projects window and the project's index.php file opens in the editor and in the Navigator window.


11. Enter the following code inside the block:

echo "Hello, world! This is my first PHP project!";

12. To run the project, position the cursor on the NewPHPProject node and choose Run from the context menu. The figure below shows what you should see in the browser window:


Install Php plugins in netbeans

1. In start page, click Install Plugins

2. Select PHP or related ones from Available Plugins tab, and click install. restart netbeans.


NetBeans IDE Installation

1. Once you have downloaded the installer file, double-click the installer's icon to launch the installer.download

2. In the install wizard, respond to the License Agreement, then click Next.

3. Specify an empty directory within which to install NetBeans IDE.
Note: This NetBeans IDE will not disrupt the settings of your other NetBeans installations because the IDE automatically creates a new user directory when launched (${HOME}/.netbeans/5.5.1).

4. Choose the JDK you want the IDE to use from the list of suitable choices in the list, then click Next.

5. Verify that the installation location is correct and that you have adequate space on your system for the installation.

6. Click Next to begin the installation.

26 Nisan 2012 Perşembe

Creating JSP Web Application in Netbeans

1. In start page, click "Install Plugins".

2. Under Available Plugins, search for "Java Web Applications". Select it.
When you select, it automatically selects its dependencies.

3. Click Install.

4. File > New Project > Web > JSP

5. Name your project as HelloWeb.


6. Click Next. Specify your server location.
I used Tomcat. Set its root directory.

7. Change body as
<body>
<h1>Hello Web !</h1>
</body>

8. Finally, Run index.jsp


3 Şubat 2012 Cuma

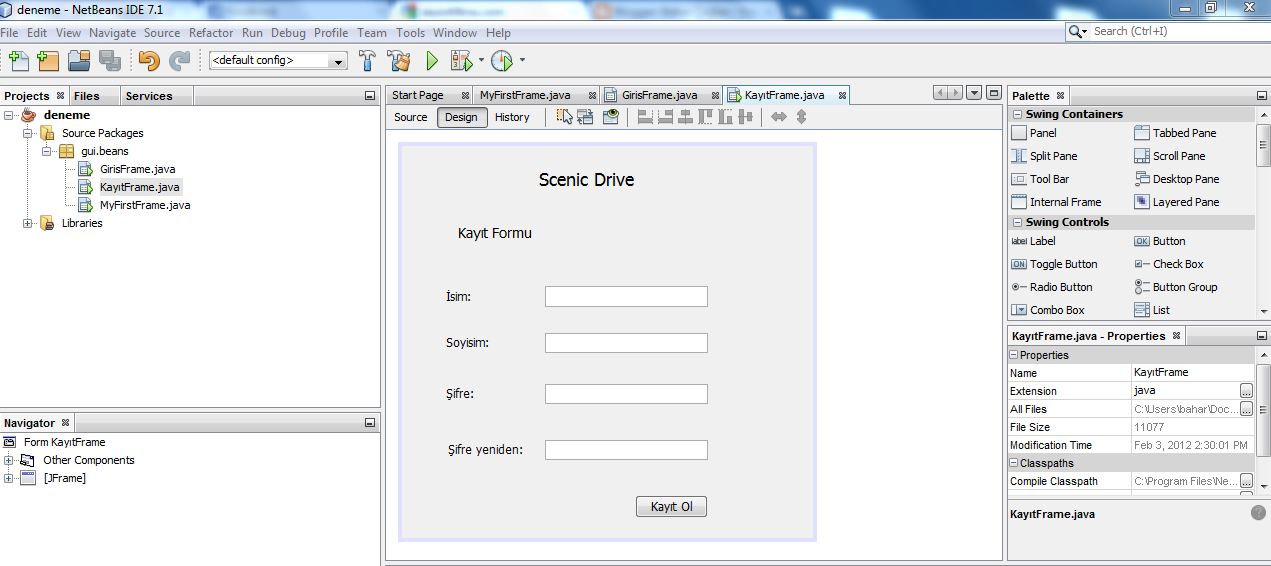
Fast and Effective GUI Building in Java

Hızlı ve güzel bir şekilde java'da gui tasarlamak için Netbeans en ideali. Design kısmından sürükle bıraklarla istediğiniz formları, login frameleri tasarlamak çok kolay.

Referans: link